
Today I want to tell you about a key strategy for elevating your Google Ads game in 2024:
Customer Match Lists.
Whether you’re using the old Google Ads interface or the new one, I’ve got you covered. This step-by-step guide will show you how to upload and manage your Customer Match Lists the right way.
If you prefer to watch this blog post as a video, click here.
What Are Customer Match Lists?
Customer Match Lists allow you to upload your customer data directly to Google Ads.
This lets you do fun stuff like retargeting your customers; modifying your bidding based on whether or not they are a customer; or creating lookalike audiences based on your best customers. It's a powerful tool when used right, so let’s dive in to how to set it up.
Step 1: Adding Customer Match Lists in Google Ads
Old Google Ads Interface
If you're using the classic Google Ads interface, here’s how to get started:

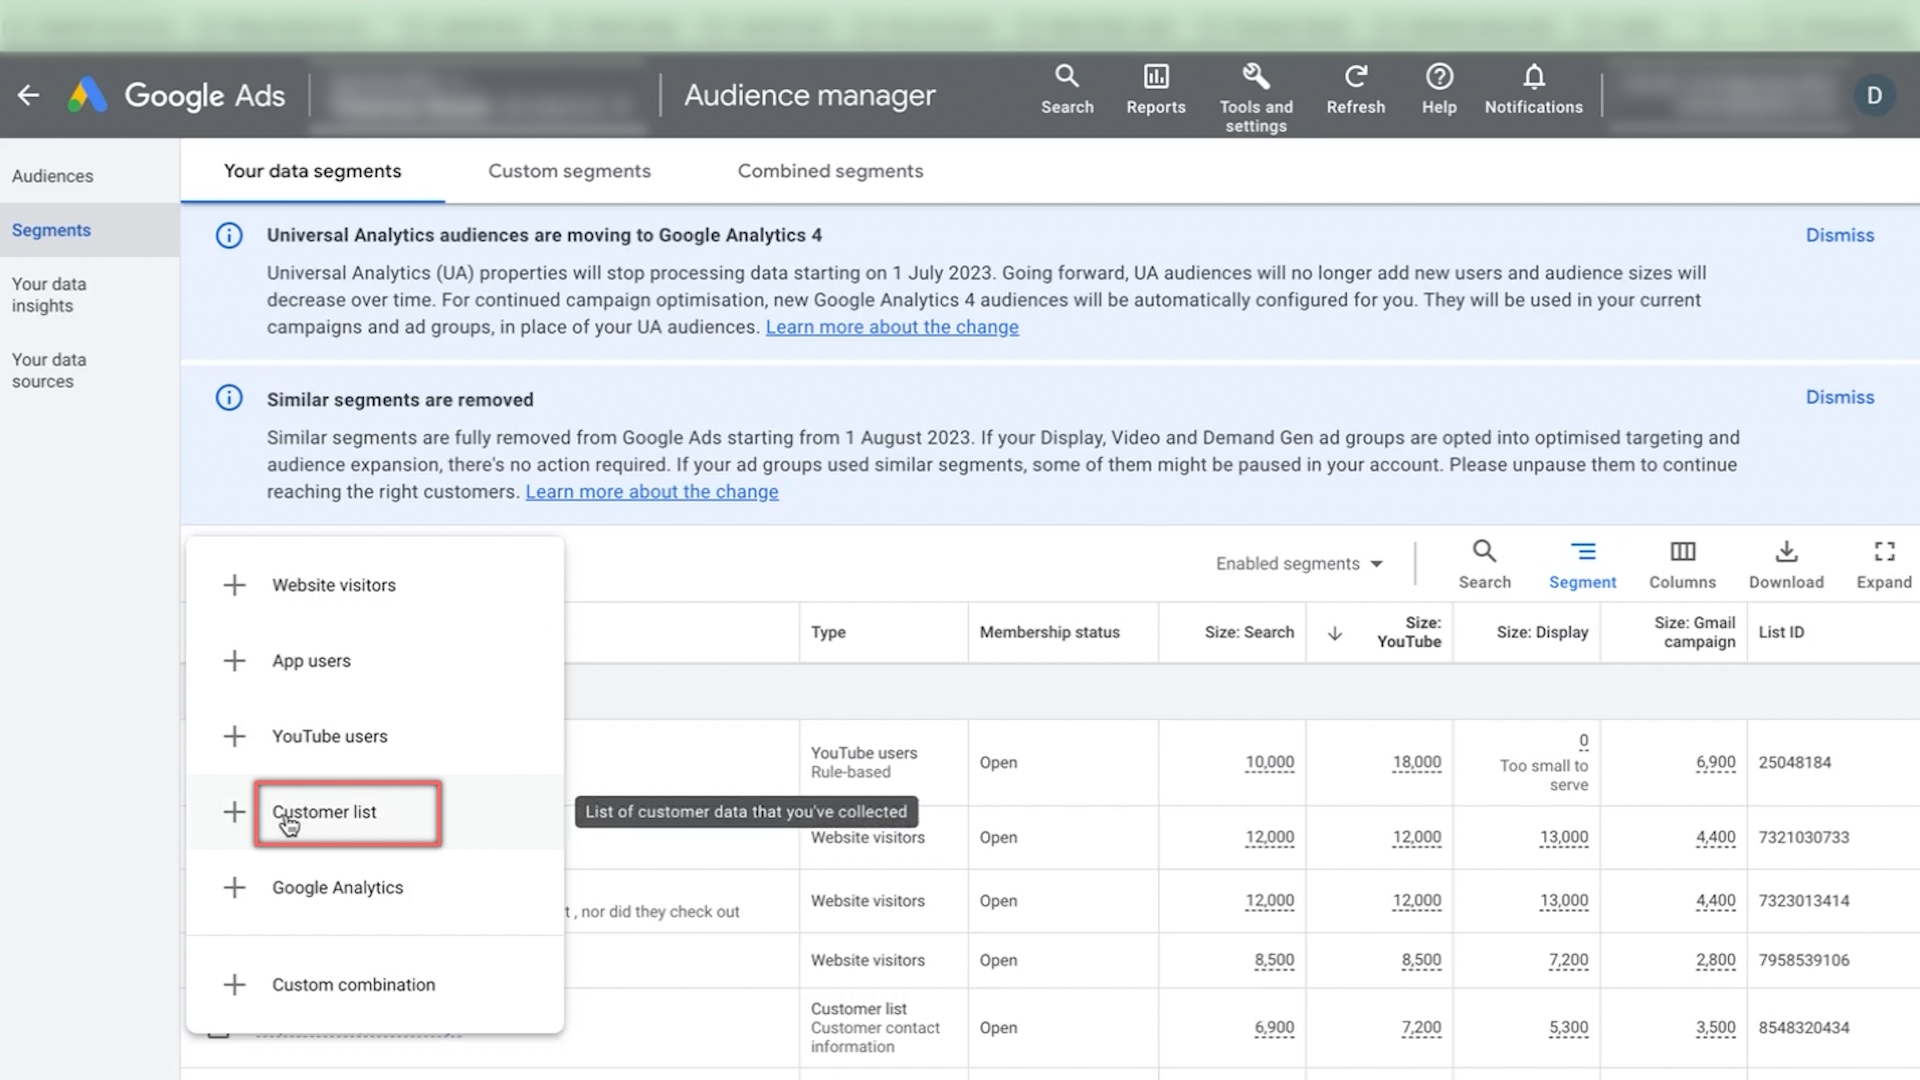
Navigate to Audience Manager: Go to the “Tools & Settings” menu, and under “Shared Library,” select “Audience Manager.”
Create a New Customer List: Click on the “+” sign and choose “Customer List.”
Upload Your File: Select “Upload a file manually,” choose your file (e.g., CSV), and fill in the required details.
Set Membership Duration: You can set the membership duration to “No Expiry” or specify a duration if you want to remove users after a certain period.
Save Your List: Once all details are set, click “Save and Continue.” Keep in mind that it might take up to 24 hours (or more) for Google to match customers to your list.
New Google Ads Interface
For those using the updated Google Ads UI, the process is slightly different but just as straightforward:
Go to Shared Library: Click on the “Tools” icon at the top of the page, then navigate to “Shared Library” and select “Audience Manager.”
Create a New Customer List: Click the “+” sign and select “Customer List.”
Upload Your File: As with the old interface, upload your customer data file, name your audience, and choose the relevant data types.
Save Your List: Finalise your settings and click “Save and Continue.” The rest of the process remains the same.
Step 2: Automating Your Customer Match Lists with Shopify and Zapier
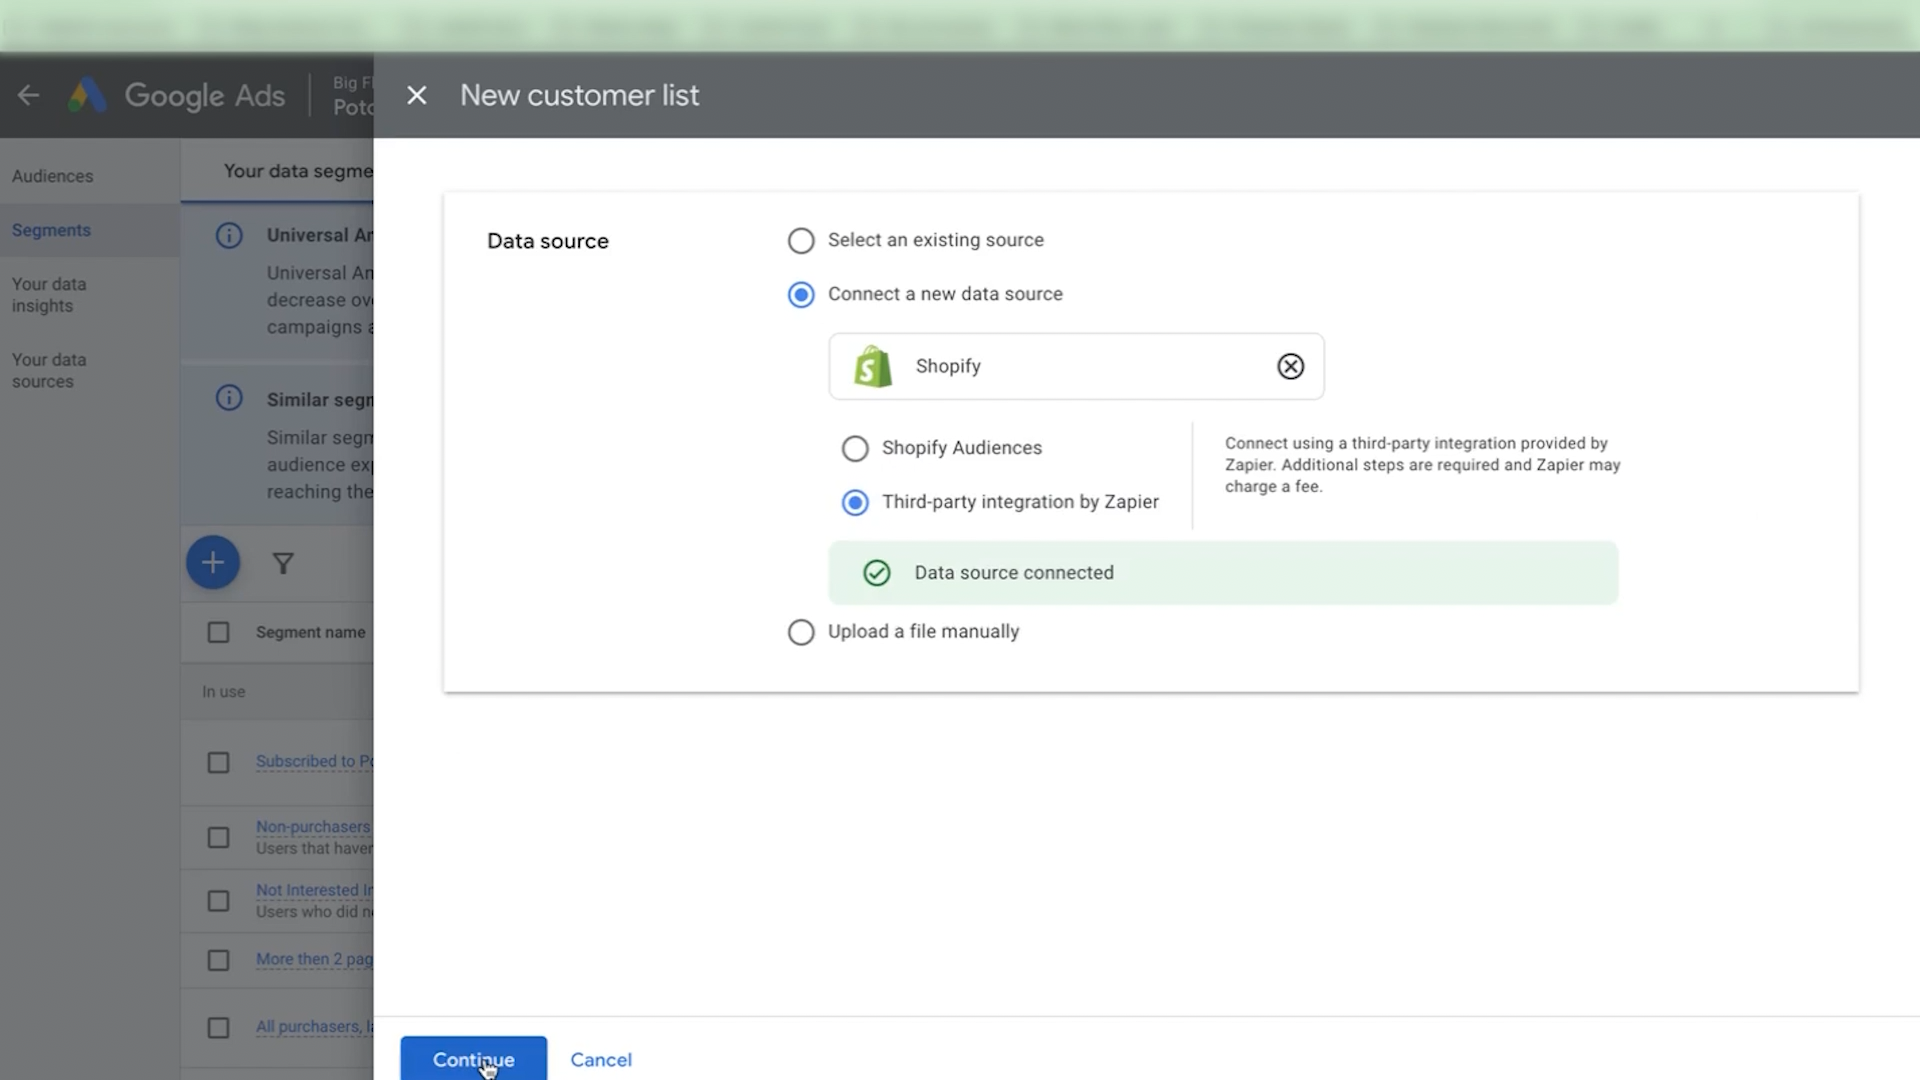
Now, if you want to take your Customer Match Lists to the next level, consider automating the process.
By integrating Shopify with Zapier, you can automatically update your Customer Match Lists as new data comes in, saving you time and ensuring your lists are always up-to-date.
Here’s How to Automate Your Lists:
Set Up a Zap in Zapier: Start by creating a new Zap. Choose Shopify as the trigger app, with the trigger being a new order or customer.
Connect to Google Ads: Set Google Ads as the action app, with the action being “Upload Customer List.”
Map Data Fields: Map the relevant data fields from Shopify to Google Ads, ensuring that all necessary customer information is captured.
Step 3: Add Customer Match Lists to Your Campaigns
Once your Customer Match Lists are set up, don’t forget to add them as audience segments in your campaigns.
This step is crucial to ensure that the lists actually take effect in your Google Ads campaigns.
For a detailed guide on how to do this, check out this video where I walk you through adding audience segments to your Google Ads campaigns the right way.
By following these steps, you’ll be able to leverage Customer Match Lists in Google Ads effectively, whether you’re using the old or new interface. Automating the process with Shopify and Zapier will further streamline your workflow, keeping your campaigns sharp and responsive.
Wrapping Up
Customer Match Lists are a powerful way to enhance your Google Ads targeting strategy. By following the steps above, you can easily set up these lists, automate updates, and integrate them into your campaigns for maximum impact.